Water is the most-used utility in your home and, unfortunately, one of the most destructive when it escapes its pipes. A single failed supply line can dump hundreds of gallons into your walls before anyone notices. At the same time, we waste staggering amounts of clean water simply by leaving faucets running while we scrub dishes or lather our hands. A motion activated water valve addresses both problems at once: it delivers water only when a hand, a tool, or a person is detected, and it can cut flow automatically when something goes wrong.
This guide walks you through everything you need to know — what these valves are, how the technology works, what the real-world savings look like, and how to install one safely. Whether you want a touchless kitchen faucet, a retrofit sensor adapter for an existing tap, or a whole-house smart shut-off valve, you will find a clear path forward here.
What Exactly Is a Motion Activated Water Valve?
The phrase covers a family of devices that share one trait: a sensor decides when water flows, rather than a human hand turning a handle. In practice, homeowners usually mean one of three things, and it is worth identifying which category you actually need before you buy anything.
- Touchless faucet valves (point-of-use): A solenoid valve built into or attached to a single faucet, triggered by an infrared or radar sensor when your hand enters the detection zone.
- Retrofit sensor adapters: An add-on module that threads onto an existing faucet aerator and controls flow with a sensor, leaving your current fixture in place.
- Whole-house automatic shut-off valves (motion/flow-triggered): A motorized ball valve installed on your main water line that closes when sensors detect abnormal flow — a burst pipe, a running toilet, or water where it should not be. Some models also respond to motion or presence sensors in a room.
These are genuinely different products with different price points and different installation demands. A touchless faucet costs $150–$500 and takes an afternoon. A whole-house shut-off system typically runs $500–$1,000 for the hardware plus installation, and it can protect your entire plumbing system.
How Motion Activated Valves Actually Work
Understanding the mechanics helps you troubleshoot later and choose the right sensor for your space.
- The sensor: Most consumer units use active infrared — an LED emits a beam and a photodiode watches for the reflection returning off your hand. Newer and more reliable models use passive infrared (PIR), ultrasonic, or millimeter-wave radar, which are less fooled by steam, soap film, and reflective surfaces.
- The controller: A small circuit board interprets the sensor signal and decides when to open or close the valve. Good controllers include adjustable range, delay, and timeout settings.
- The valve: A solenoid or motorized ball valve does the physical work. Solenoids are fast and cheap but can be noisy; motorized ball valves are quieter and hold up better in hard water.
- Power: Options include AA or C batteries, a low-voltage transformer plugged into a GFCI outlet, or — increasingly common — a small turbine that harvests energy from the water flow itself, so no wiring or batteries are ever needed.
On whole-house systems, the "sensor" is usually a flow meter combined with pressure and temperature readings. The valve learns your household's normal water signature — how much a shower uses, how long the dishwasher runs — and shuts off when the pattern breaks. Some units also integrate with leak pucks placed under sinks, water heaters, and washing machines.
Why Homeowners Are Installing Them: Benefits and Real-World Data
The appeal is not just novelty. There is hard data behind the decision.
- Water conservation: According to the U.S. Environmental Protection Agency, household leaks waste nearly 1 trillion gallons of water nationwide each year, and roughly 10% of homes have leaks wasting 90 gallons or more per day. A single faucet dripping once per second wastes more than 3,000 gallons annually.
- Hands-free savings: Studies of commercial restrooms have found sensor faucets reduce water use by anywhere from roughly 20% to more than 50% compared with manual fixtures, depending on the setting and how well the sensor is calibrated. Notably, poorly tuned sensors can waste water through false triggers — which is why calibration matters as much as the hardware.
- Damage prevention: Insurance industry data puts the average water damage claim in the $10,000–$12,000 range, and water damage remains one of the most frequent and costly homeowners claims. An automatic shut-off valve that closes within seconds can prevent the bulk of that loss.
- Hygiene: In kitchens, touchless operation means raw chicken juice on your hands never reaches the handle. That is a genuine food-safety benefit, not a marketing line.
- Accessibility: For children, older adults, and anyone with arthritis or limited grip strength, waving a hand is dramatically easier than turning a stiff lever.
Tools and Materials You Will Need
For a faucet-level installation, gather the following before you start. Shutting off the water and then discovering you lack a basin wrench is a frustrating way to spend an evening.
- Adjustable wrench and a basin wrench (for tight under-sink spaces)
- Phillips and flathead screwdrivers
- Plumber's tape (Teflon) and pipe thread sealant
- Bucket and old towels
- Flashlight or headlamp
- New supply lines and washers (replace them while you are in there)
- Wire nuts or lever connectors if hardwiring
- GFCI outlet tester if you are adding a transformer
- Zip ties for cable management
Step-by-Step Installation
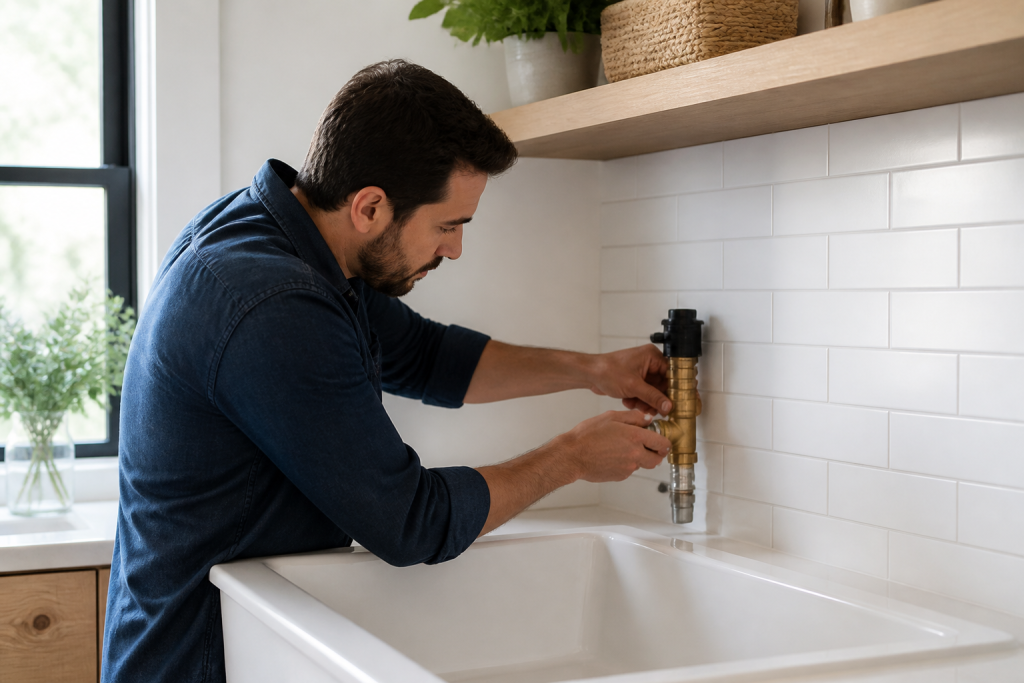
The process below covers a sensor faucet or retrofit valve. Whole-house shut-off valve installation should generally be handled by a licensed plumber, since it involves cutting into the main line.
Step 1: Shut Off the Water and Drain the Line
Close the angle stops under the sink (turn clockwise). Open the faucet to release pressure and confirm the water has stopped. Place your bucket under the supply lines. If the angle stops are corroded or will not close fully, shut off the main and plan to replace them.
Step 2: Remove the Existing Fixture or Adapter
Disconnect the hot and cold supply lines from the faucet shanks. Remove the mounting nut with your basin wrench, then lift the faucet free from above. Clean the sink deck and inspect the mounting holes for rust or cracking. If you are installing a retrofit sensor adapter instead, simply unscrew the existing aerator — but check the thread size first, since adapters are sold in several standards.
Step 3: Mount the New Sensor Valve
Feed the supply lines and the sensor cable through the mounting hole. Position the faucet or valve body, then tighten the mounting nut from below. Do not overtighten — a cracked sink deck is an expensive mistake. Hand-tighten plus a quarter turn is usually sufficient.
Step 4: Connect Power
If your unit uses batteries, install them now and check that the sensor LED responds. For transformer-powered units, plug into a GFCI-protected outlet and route the low-voltage cable away from the drain line. If your model harvests power from water flow, you can skip this step entirely — a major reason these models have become popular.
Step 5: Reconnect the Water Supply
Wrap the threads of each supply line with plumber's tape, then hand-tighten and finish with a quarter turn of the wrench. Turn the angle stops back on slowly and watch for weeping at every joint for a full minute. A slow drip now is a flooded cabinet later.
Step 6: Calibrate and Test
Restore power and wave your hand through the detection zone. Most units let you adjust the sensor range and the shut-off delay — a shorter delay saves more water but can be annoying when you are filling a pot. Set the temperature with the manual handle (or the mixing valve), then run the faucet for two full minutes to flush any debris from the new valve.
Case Study: A Family of Four in a 1970s Ranch House
Consider an illustrative scenario that plays out in thousands of homes each year. A family of four in a 1978 ranch house installs a touchless sensor faucet in the kitchen and a whole-house automatic shut-off valve on the main line. The kitchen faucet alone, used roughly 30 times a day, cuts about 0.4 gallons per use through shorter run times and the elimination of "walk-away" flow — roughly 4,300 gallons a year, or about 12% of the household's total indoor use.
Eight months later, a washing machine supply hose ruptures at 2 a.m. The whole-house valve detects an abnormal flow rate — far above any normal appliance draw — and closes within 15 seconds. Instead of the 200-plus gallons that would have poured across the laundry room floor over an hour, the family mops up a small puddle. Their deductible stays untouched, and the floor joists stay dry.
Common Installation Mistakes to Avoid
- Ignoring local plumbing code: Some jurisdictions require specific backflow prevention or restrict certain valve types on the main line. Check before you cut.
- Skipping the GFCI: Any electrical component near a sink should be on ground-fault protection.
- Mounting the sensor behind an obstruction: A soap dispenser or a deep sink bowl can block the detection cone and cause constant false triggers.
- Leaving old supply lines in place: Rubber hoses have a service life of about five years. Replace them with braided stainless while you have access.
- Failing to test under pressure: Always run water for several minutes and check every joint with a dry paper towel before closing up the cabinet.
Maintenance, Troubleshooting, and Calibration
- False triggers: Reduce sensor range, reposition the unit, or switch to a radar-based model if steam or reflective surfaces are the culprit.
- No response: Check batteries first, then confirm the solenoid is receiving power. Hard-water scale on the valve seat is the second most common cause.
- Reduced flow: Clean the aerator screen and the inlet filter — sediment is the enemy of every solenoid valve.
- Annual check: Test the shut-off function manually once a year, and replace batteries on a fixed schedule rather than waiting for a failure.
Cost Breakdown: What Should You Budget?
- Retrofit sensor adapter: $40–$120
- Touchless kitchen faucet (DIY install): $150–$500
- Whole-house smart shut-off valve, hardware only: $500–$1,000
- Professional installation of a main-line valve: $300–$800
- Plumber for a faucet install, if you would rather not DIY: $150–$300
Compare that to the average water damage claim and the math tends to favor installation, especially if your home has older plumbing or a second-floor laundry room.
Final Thoughts
A motion activated water valve is one of the few home upgrades that pays you back in two currencies at once: lower water bills and protection against catastrophic damage. The technology has matured to the point where reliable, self-powered units exist at reasonable prices, and installation for a faucet-level device is genuinely a weekend-afternoon project for a confident DIYer.
The key takeaways are straightforward. First, decide which category you need — point-of-use touchless convenience or whole-house leak protection — because they solve different problems. Second, respect the fundamentals: shut off the water, replace aging supply lines, use GFCI protection, and test under pressure before you call it done. Third, calibrate the sensor rather than accepting factory defaults; a well-tuned valve saves water, while a poorly tuned one can waste it. Finally, treat the whole-house shut-off valve as the higher-value investment if your priority is preventing five-figure damage rather than shaving a few gallons off your bill.
Start with one faucet. Once you see how naturally the motion-activated flow becomes part of your routine, you will likely be planning the next installation before the month is out.